Google Analytics accounts have always been spammed, in particular in the event sections. Waves of direct traffic, with an average session duration close to zero and a bounce rate close to 100% are not new either. However, since November 2016, some uncommon languages have been appearing in many Google Analytics accounts.
Spam shows up in Google Analytics as erratic traffic concentrated on specific days, and never leads to a single conversion.
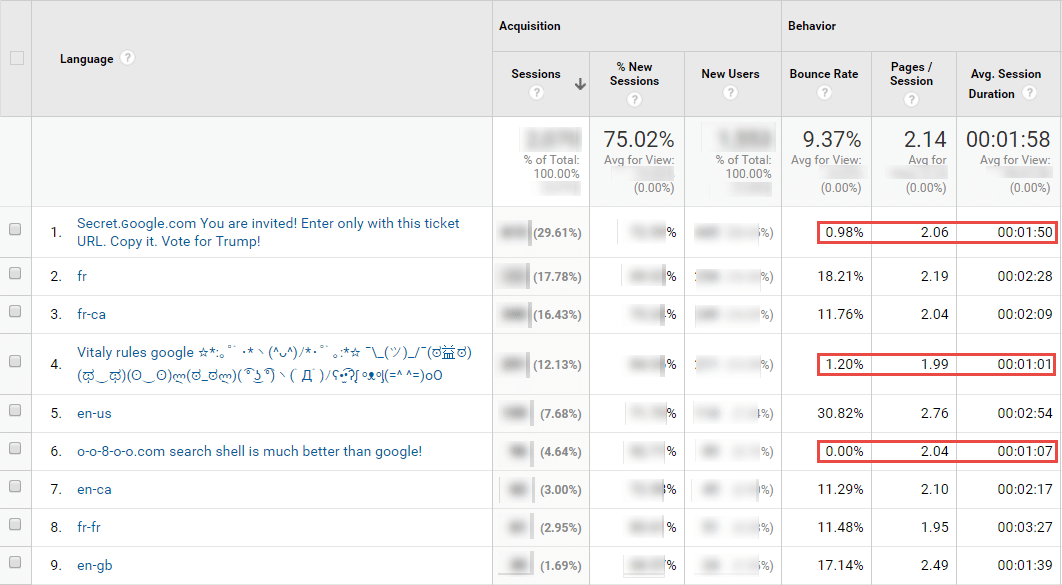
But unlike traditional spam, this new type of spam is much harder to detect. The related metrics make it appear more like real traffic from actual humans like you and me (unless you’re a robot). We used to see that traffic generated through spam was made up of single hits per session, which appeared in reports as bounce rates of 99.9%, an average session duration of less than 1 second, and only one page view per session… In the present case, the numbers don’t lie, it’s clearly spam: Way below average bounce rates, erratic traffic. The difference here is the number of page views, which impacts bounce rates and session duration, making it look more like human traffic. This means spammers have improved their algorithms to make them seem more human.
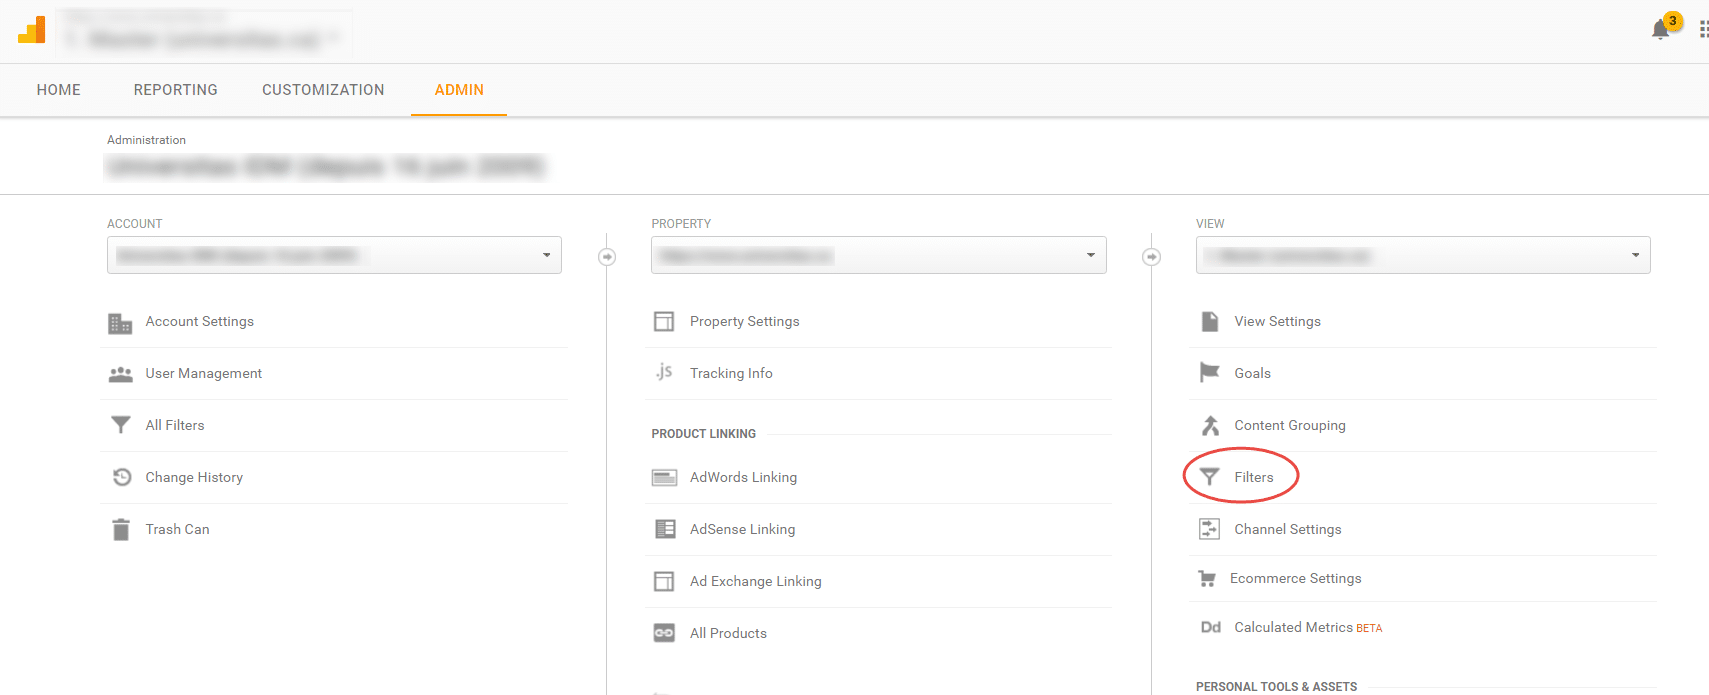
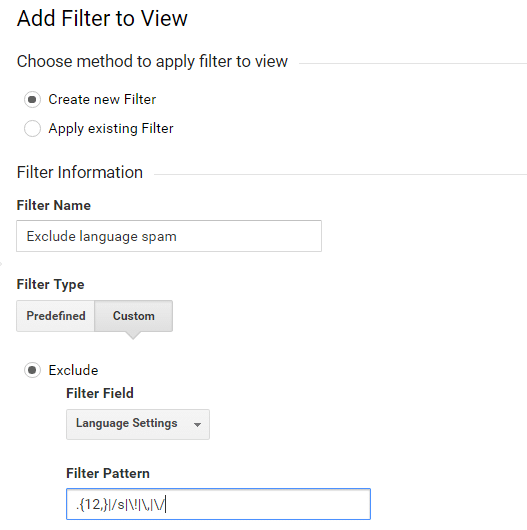
This type of traffic can sometimes skew your data significantly for certain periods, so it’s important to protect yourself by adding a view-level language filter. Here’s how: